반응형
테스트환경
- ec2 서버 (ubuntu)
- airflow 싱글노드로 구성

Airflow 설치하기
1) ec2 서버 접속
- pem 파일 다운로드
- Windows Power shell 실행
- pem 파일 있는 디렉토리로 이동
cd C:\Users\GRAM14\Desktop\study\programmers_de- ssh 접속
ssh -i <pem 파일명> ubuntu@<ec2 호스트네임>
2) python 업데이트 및 설치
sudo apt-get update
sudo apt-get install -y python3-pip
3) airflow 및 python 모듈 설치
sudo pip3 install apache-airflow==1.10.13
sudo pip3 install cryptography psycopg2-binary boto3 botocore
4) airflow 서버계정 생성
sudo groupadd airflow
sudo useradd -s /bin/bash airflow -g airflow -d /var/lib/airflow -m- airflow 계정의 홈디렉토리를 /var/lib/airflow로 설정한다.
5) postgres 설치 및 DB 계정생성
sudo apt-get install -y postgresql postgresql-contrib- airflow의 메타데이터를 저장할 용도로 DB가 필요하다. Defalut DB는 SQLite인데 싱글 쓰레드만 가능해서 성능이 낮다. 그래서 postgres DB를 사용할 것이다.
- postgresql을 설치하면 postgres라는 계정이 자동으로 생성된다.
$ sudo su postgres
$ psql
psql (10.12 (Ubuntu 10.12-0ubuntu0.18.04.1))
Type "help" for help.

postgres=# CREATE USER airflow PASSWORD 'airflow';
CREATE ROLE
postgres=# CREATE DATABASE airflow;
CREATE DATABASE
postgres=# \q
$ exit- psql(postgresql 클라이언트 툴)을 실행하여 airflow에서 사용할 DB 계정을 생성한다.
sudo service postgresql restart
6) airflow 설정
sudo su airflow
cd ~/
mkdir dags
AIRFLOW_HOME=/var/lib/airflow airflow initdb
vi /var/lib/airflow/airflow.cfg|
[core] ... executor = LocalExecutor ... sql_alchemy_conn = postgresql+psycopg2://airflow:airflow@localhost:5432/airflow ... load_examples = False |
- executor
| 설정값 | 의미 |
| SequentialExecutor (Default) | task가 한 번에 한 개만 수행됨. - Airflow DB가 sqlite(싱글작업만 가능)일 때 유일하게 가능한 executor 설정임. |
| LocalExecutor | task들이 local에서 병렬적으로 수행됨. - Unlimited Parallelism : task 개수 제한 없음 - Limited Parallelism : task 개수 제한 있음 (task queue 존재) |
| CeleryExecutor | 별도의 메세지 브로커가 필요함 (ex. RabbitMQ) - 스케쥴러가 task를 메세지 브로커에 전달함 - 워커가 task를 실행함 |
| DaskExecutor | |
| KubernetesExecutor | |
| CeleryKubernetesExecutor | |
| custom |
- sql_alchemy_conn
Airflow DB 접속정보 설정
Default는 sqlite DB이다. sqlite는 한 개의 작업만 가능하기 때문에 운영환경에 적합하지 않다.
Postgres 또는 MySQL을 사용할 것을 권장한다.
- load_examples
예시 DAG들을 다운로드 받을 건지 받지 않을 건지 설정
AIRFLOW_HOME=/var/lib/airflow airflow initdb
7) airflow 실행
- airflow webserver와 scheduler를 서비스 데몬으로 만든다.
sudo vi /etc/systemd/system/airflow-webserver.service| [Unit] Description=Airflow webserver After=network.target [Service] Environment=AIRFLOW_HOME=/var/lib/airflow User=airflow Group=airflow Type=simple ExecStart=/usr/local/bin/airflow webserver -p 8080 Restart=on-failure RestartSec=10s [Install] WantedBy=multi-user.target |
sudo vi /etc/systemd/system/airflow-scheduler.service| [Unit] Description=Airflow scheduler After=network.target [Service] Environment=AIRFLOW_HOME=/var/lib/airflow User=airflow Group=airflow Type=simple ExecStart=/usr/local/bin/airflow scheduler Restart=on-failure RestartSec=10s [Install] WantedBy=multi-user.target |
- 데몬을 reload하여 최종 생성한 후 실행한다.
sudo systemctl daemon-reload
sudo systemctl enable airflow-webserver
sudo systemctl enable airflow-scheduler

sudo systemctl start airflow-webserver
sudo systemctl start airflow-scheduler
8) airflow webserver 계정생성
- airflow webserver 계정설정을 위해 필요한 python 모듈을 설치한다.
pip3 install flask_bcrypt
pip3 install -U Werkzeug==0.16.0
- airflow webserver 설정을 한다. 계정으로 로그인하도록 authenticate를 True로 설정한다.
sudo su - airflowvi /var/lib/airflow/airflow.cfg| [webserver] ... authenticate = True auth_backend = airflow.contrib.auth.backends.password_auth |
- 계정 생성하는 python 스크립트를 작성한다.
vi /var/lib/airflow/createUser.pyimport airflow
from airflow import models, settings
from airflow.contrib.auth.backends.password_auth import PasswordUser
user = PasswordUser(models.User())
user.username = 'sunny'
user.email = 'sunny@test.com'
user.password = 'sunny'
user.superuser = True
session = settings.Session()
session.add(user)
session.commit()
session.close()
exit()
- python 스크립트를 실행한다.
AIRFLOW_HOME=/var/lib/airflow python3 createUser.py
9) airflow 접속
http://<ec2_hostname>:8080

- 위에서 생성한 계정으로 로그인한다.
DAG 작성하기
/var/lib/airflow/dags/HelloWorld.py
from airflow import DAG
from airflow.operators import PythonOperator
from datetime import datetime
def print_hello():
print("hello!")
return "hello!"
def print_goodbye():
print("goodbye!")
return "goodbye!"
#DAG 설정
dag = DAG(
dag_id = 'my_first_dag',
start_date = datetime(2021,1,30),
schedule_interval = '20 4 * * *'
)
#DAG Task 작성
print_hello = PythonOperator(
task_id = 'print_hello',
#python_callable param points to the function you want to run
python_callable = print_hello,
#dag param points to the DAG that this task is a part of
dag = dag
)
print_goodbye = PythonOperator(
task_id = 'print_goodbye',
python_callable = print_goodbye,
dag = dag
)
#Assign the order of the tasks in our DAG
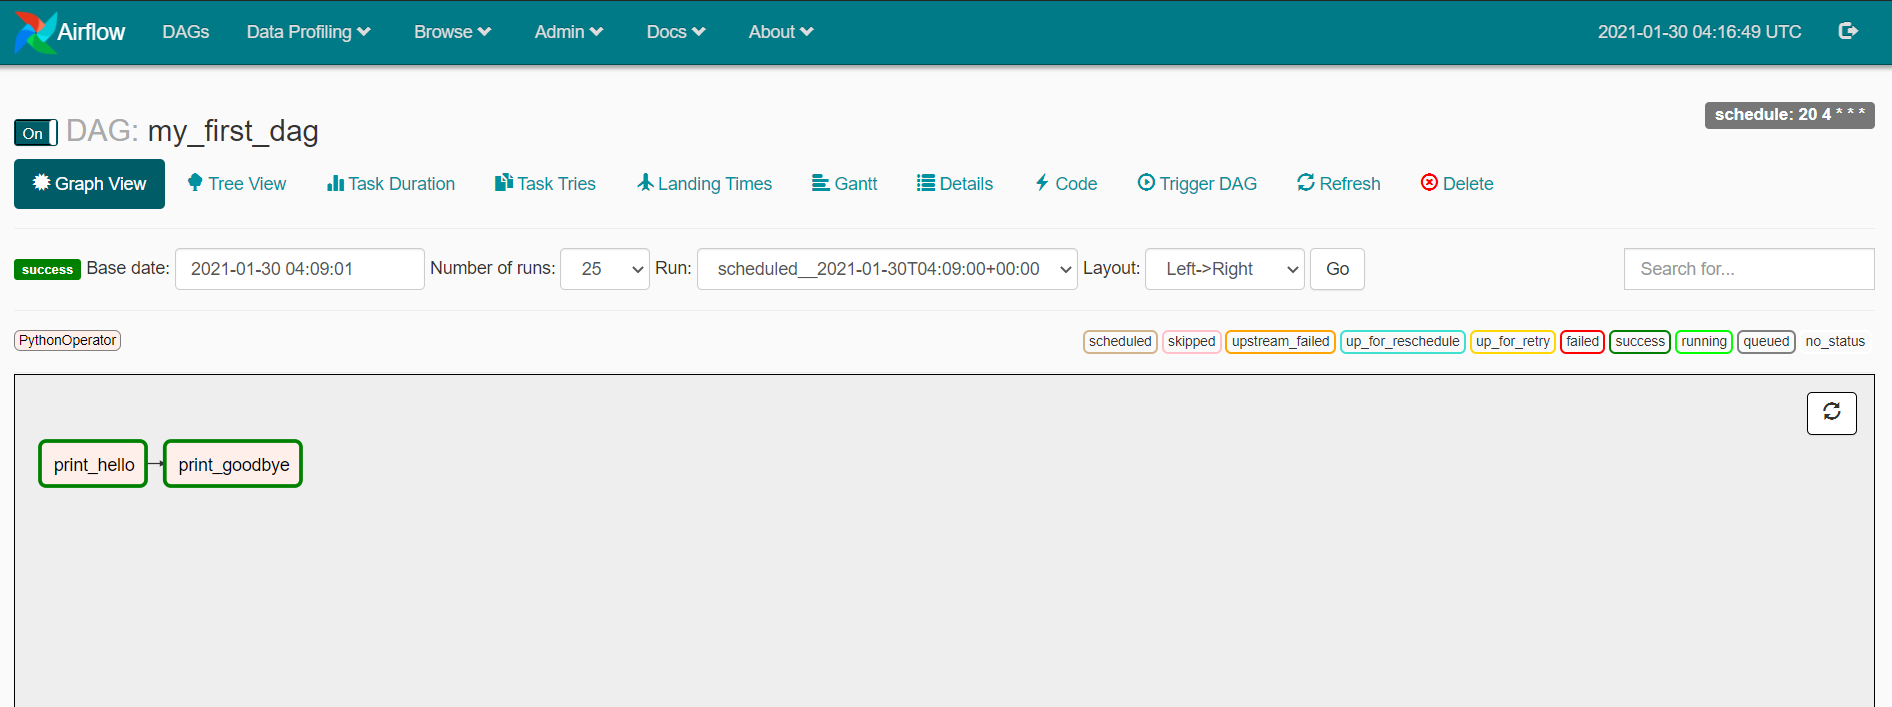
print_hello >> print_goodbyePython Operator로 구성된 Task를 작성해본다.
- TASK1 : print_hello() 함수 호출
- TASK2 : print_goodbye() 함수 호출
DAG 실행하기(WEB)
- DAG 스케쥴을 On으로 바꾼다.

- trigger DAG를 클릭한다.
- start_date 날짜의 다음 날부터 실행된다.(일배치일 때)
- 스케쥴 설정 관련해서는 따로 포스팅할 예정이다. (겁나 헷갈린다)
- start_date를 예전 날짜로 잡으면 현재까지 기간만큼 스케쥴이 실행된다.(CatchUp이 True일 때)
- 예를들어, 오늘이 2021-02-05이고, start_date를 2021-02-01로 설정했다고 하자.
- 그러면 2021-02-01 기준부터 스케쥴이 실행된다. (오늘 날짜랑 상관없이)
- 그러고 2021-02-02, 2021-02-03, 2021-02-04 기준으로도 스케쥴이 실행된다.
- 테스트용도로 DAG를 한 번 돌려보고 싶으면 어떻게 해야할까?
- start_date를 어제 날짜로 설정한다. (start_date = datetime(2021,2,4))
- schedule_interval을 @once로 설정한다. (schedule_interval = '@once')
- dag 실행이력을 clear 해준다. (airflow clear <dag id>) 또는 Airflow 웹에서 Trigger DAG를 한다.
DAG 실행하기 (CLI)
airflow test <dag_id> <task_id> <execution_date>
- execution_date는 start_date와 또 다른 개념이다. 이것도 따로 포스팅이 필요하다.
- task 여러개여도 한 개만 실행됨. 순서 설정해도 한 개만 실행됨. DAG 전체 돌리는 방법은?
- CLI에서 Dag를 실행하는 경우, task 상세로그가 남지 않는다. Logs에 cli 실행했다고만 나온다.

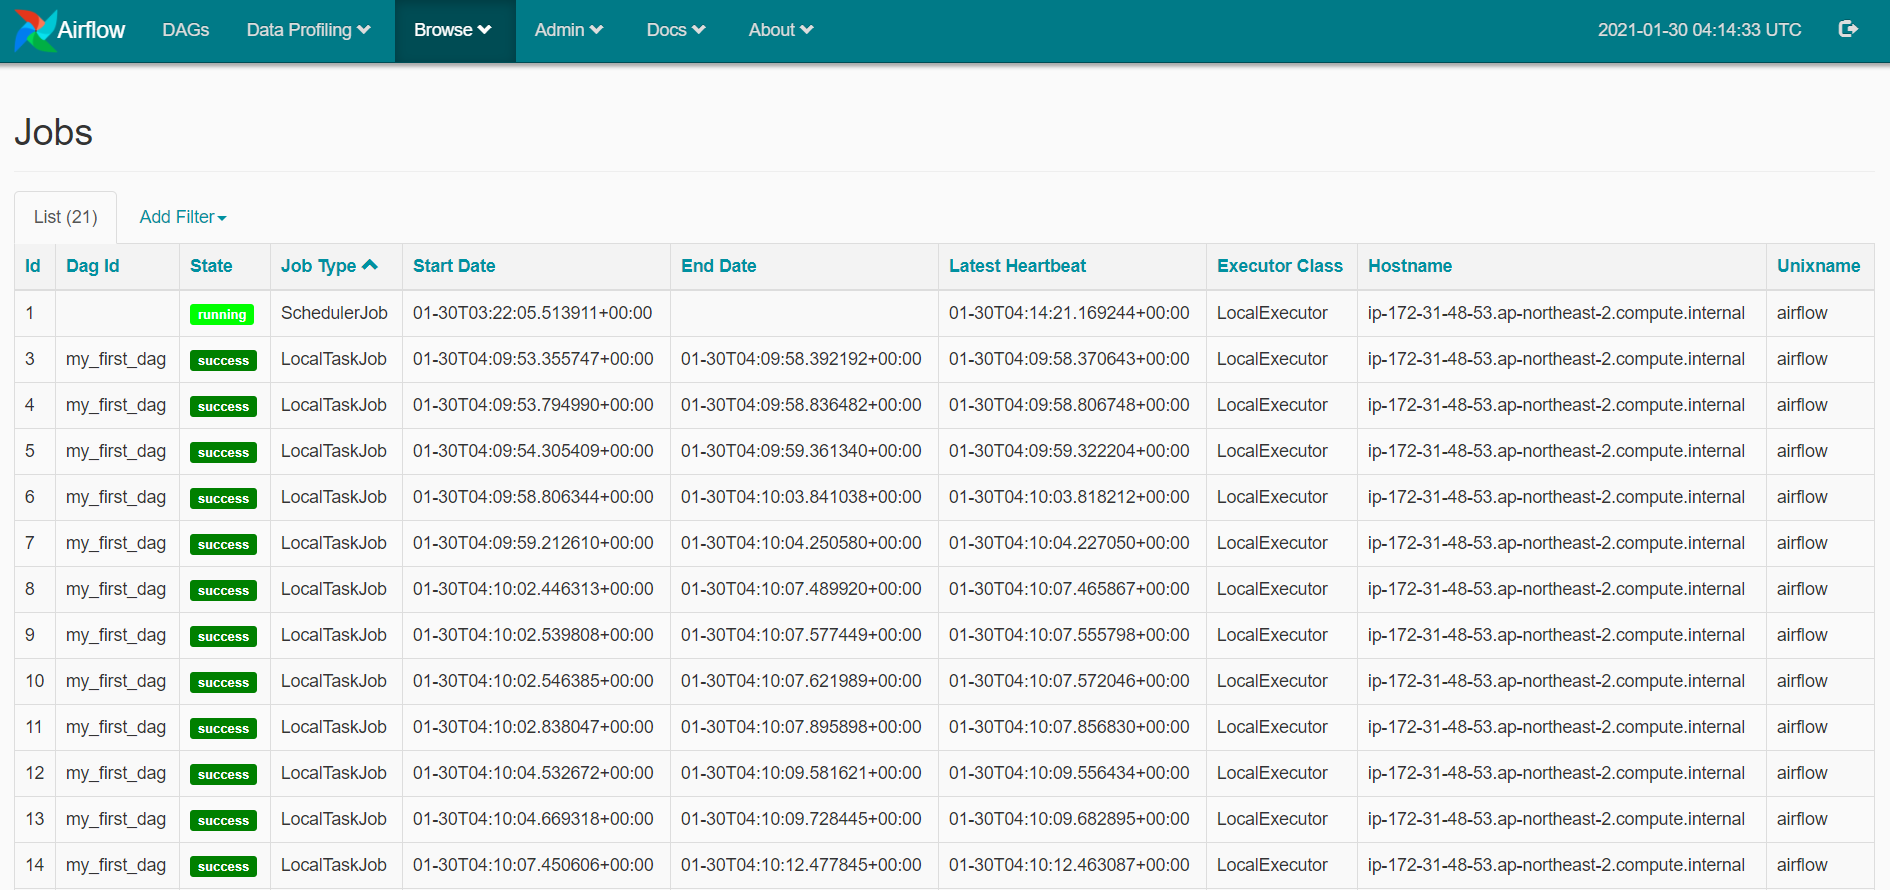
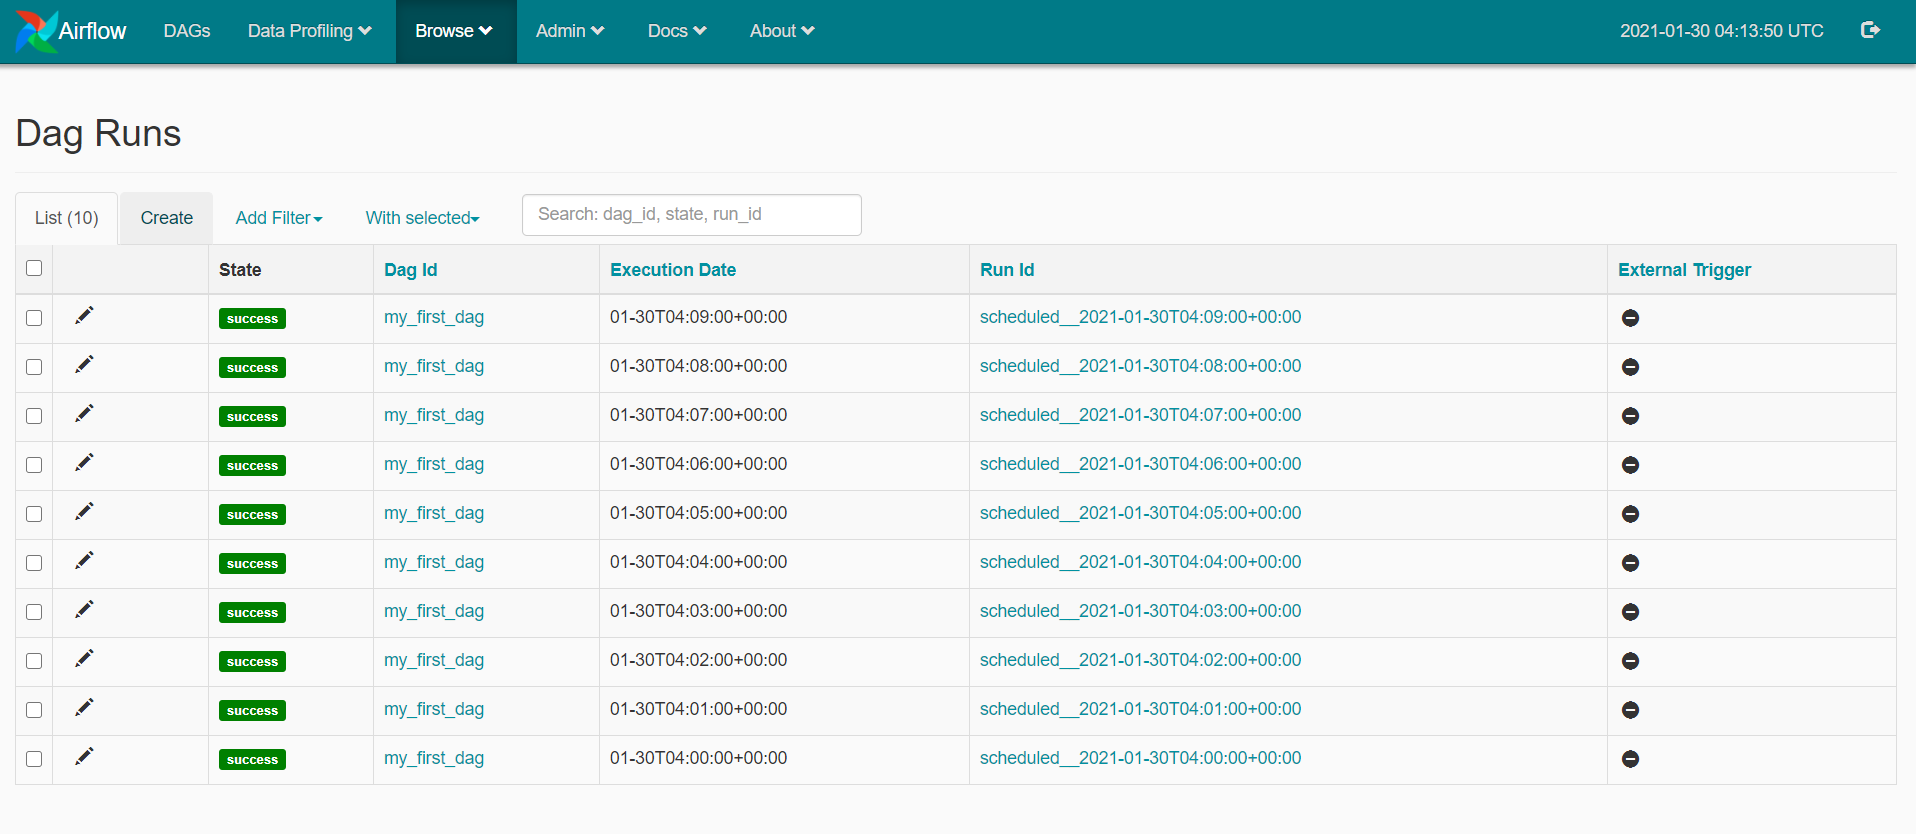
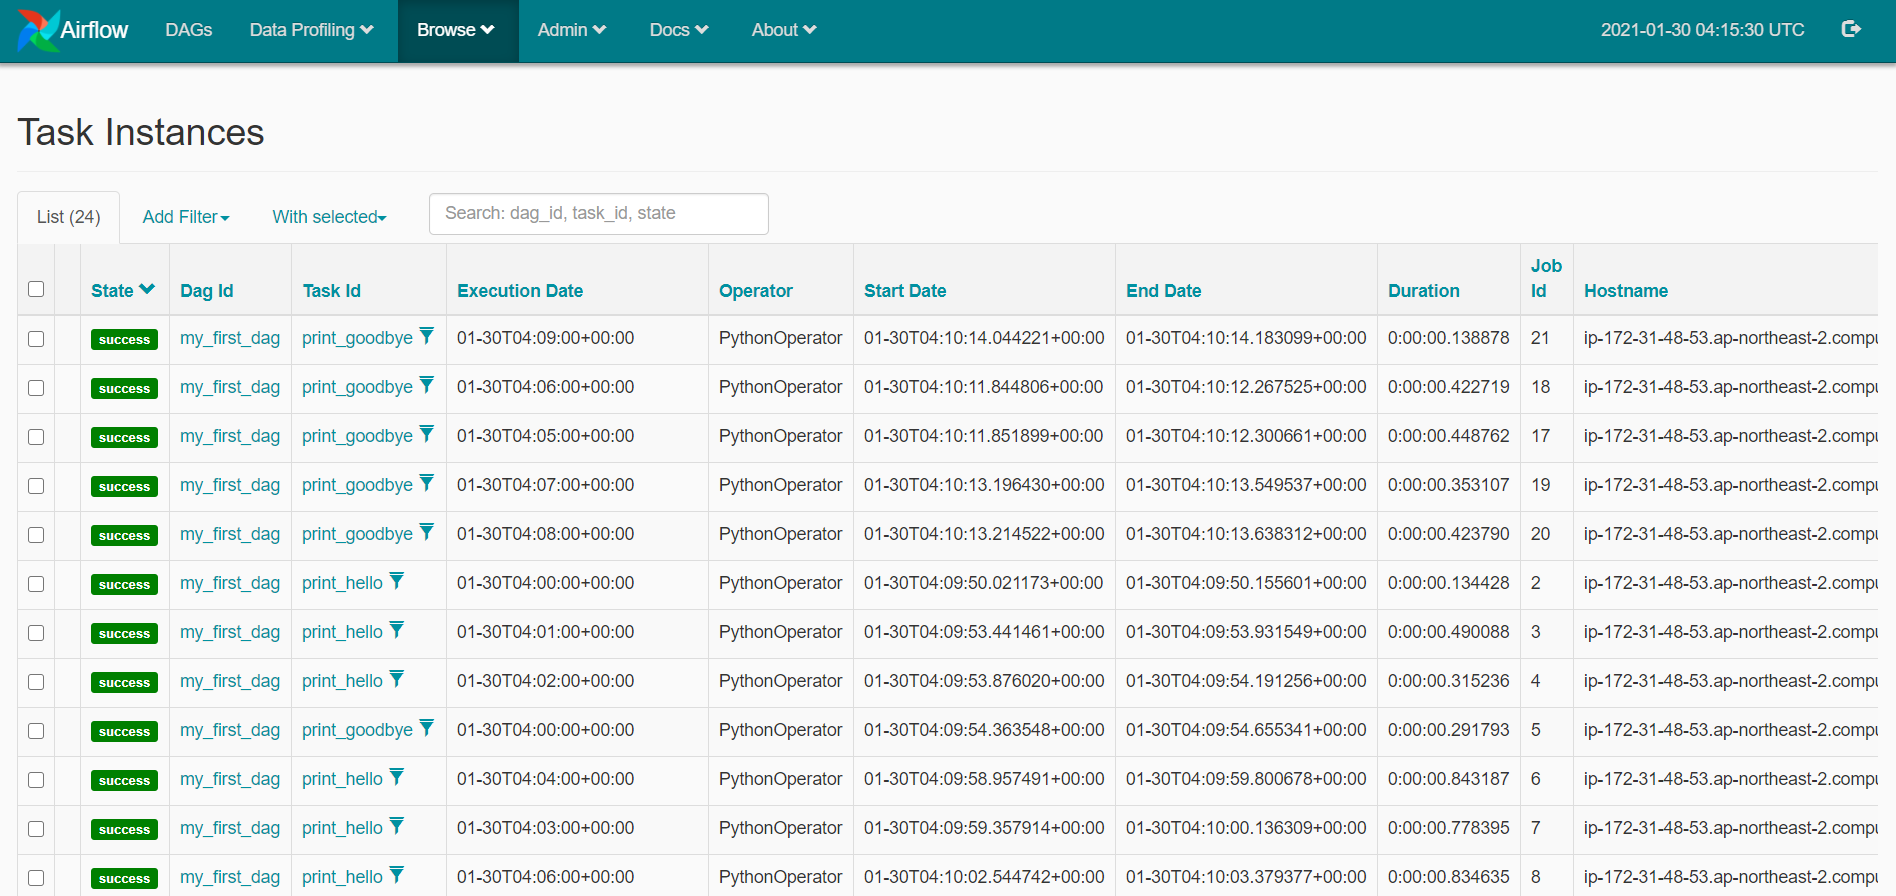
실행결과 모니터링
JOBS > DAG > Tasks
참고링크
keeyong/data-engineering
Contribute to keeyong/data-engineering development by creating an account on GitHub.
github.com
Concepts — Airflow Documentation
airflow.apache.org
반응형
'Side Project > Airflow로 ETL 구축하기' 카테고리의 다른 글
| [Airflow] Airflow 서버에서 S3 접근하기 (S3Hook) (4) | 2021.03.13 |
|---|---|
| [Airflow] task에서 return한 값 사용하기 (XCom) (6) | 2021.02.19 |
| [Airflow] python 함수 호출시 argument 넘기기 (4) | 2021.02.19 |
| Airflow 스케쥴시간 설정 (execution_date, start_date) (3) | 2021.01.31 |


댓글